Showing posts with label Warhammer 40K. Show all posts

Saturday, September 26, 2020

Green TIEde Fighter - Spork's Fighta-Bomba - our Ork looted TIE fighter

The Green TIEd Fighta!
Another Fork and Spork - Pink Orks Looting Story:

One fine day aboard Fork and Spork's space hulk "Da Runcible Uv Ruin" Big Mek 'Eavy Tork shouted, "Oi!  Someting on da scannie!"

Da RUR (Da Runcible Uv Ruin) had been skipping through the Warp for some time now and much to the delight of Fork and Spork had brought the clan an exciting string of battles and an even more exciting chain of Lootins wif Dakka.

This particular day, the Orks pulled in a small craft which was spinning through space.  Inside they found an odd Space Marine -- whose black helmet and cape were a bit out of place.

"Mus' be we iz in some galaxy far, far awayz an' maybe a long, long time ago to find someting dis strange," grunted Spork when 'Eavy Tork showed him the salvage.

"But, let's loot it!" Spork continued, "An' dat humie looks burnt already - I donts want to eat any burnt hummus!"


Even with the Force powers, Darth Vader has no idea what is in store for his TIE Fighter!

In the "21st century Earth timeline" it started out as a Goodwill thriftstore find.  $3.19 for a Darth Vader TIE Fighter (Advanced) model.  Missing the cockpit hatch; missing the little Darth Vader figure.  And, right away, our Ork Lootin' gears started turning....


The raw material for our Green TIEd Fighta!  $3.19 price written in Sharpie pen.

First of all, it seemed fair that we should add some Orky metal onto the TIE fighter's damaged panels.  Would help it to go fasta and also be a place where we could have Orks with magnet boots stand on the model.


We found some pieces of sheet metal which were unused from an IKEA cabinet build.  Bent those around and with some epoxy, done -- onto the model to reshape the damaged panel.

The Vader TIE model had a nice little panel which slid open to view the engine compartment.  We decided to reshape the plastic and glue that open so that we could add some power feeds into that hardware later in the looting....


One of the fun things is always deciding how to modify looted 'ardware.

And we decided to add wings.  Why add the wings?  More places for guns!!!  Added some turreted guns with magnet attachments we had lying around.  Also -- made a nice place to hang some Ork bombs as well.


A look at some of our major modifications.

We also decided to add some bits to the bottom of the Fighta.  It was pretty boring without those....  We "borrowed" the engines from a Space Marine speeder to increase top speed.


A look underneath the plane.  Adding bits for more interest down here.

We had a big debate over whether or not to treat the cockpit with a Gorka/Morka face.  As a compromise the face is attached with a magnet.  So, when desired, it comes off.  This is also fun because we can change the angle of the face for different "Ork-titudes".


A view from the front of the Green TIEd Fighta - still a work in progress...

We found a pilot who would fit down into the cockpit (most of the way).  And, we added some plumbing from the engines to other areas on the plane.  This was going to be one of Spork's pink Ork's vehicles.  So, we used our method of super bright pink with Vallejo Paint in several areas.  To break up the coloring we decided to also create black and white stripes in the cockpit area.


Making progress.  Some pink in fun places and wiring and plumbing completed....

One of us is not such a great painter.  So, pretty happy that the white and black pattern turned out reasonably well....


Progress so far....


Added some special effects for twin-ion-engine plus smokey exhaust

And, wrapping up, one thing we have realized is that Ork model looting is never really finished.  There is always the chance to think of one more random bit to add -- one more hose or pipe to plumb -- or one more fun way to add color to the model.  

Feeling good about the progress so far.  But, whoah! we clearly need to do some work on our bases! 

Took a photo of the Green TIEd Fighta on an attack run with squadron mate :)
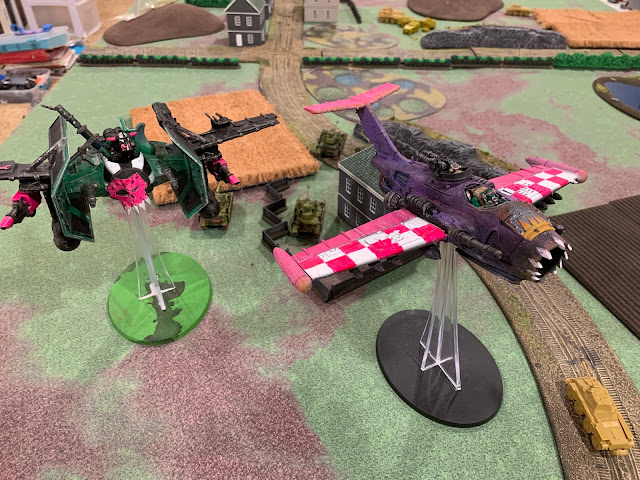

Green TIEd Fighta on attack run with squadron mate

Saturday, December 9, 2017

Clean up the beach - make cool terrain!!

Hi everyone,


Here's our *Process Flow* of steps for taking Ocean Plastic from the beach to create Tabletop Gaming terrain!

Here's an interesting (and fun?) or at the very least positive idea for those of us who like the beach and like table top games!!

The beach on the Eastern Shore or Oahu.  Lots of plastic washed up onto the beach after days, weeks, months or years in the Pacific Ocean.

1) Go to the beach (when you can - or ask a friend who is going)
2) Collect beach plastic (which doesn't belong there anyway)
3) Make terrain and bases out of the weathered plastic pieces

Over the recent holiday we had the chance to visit Hawaiian island Oahu.  It was lots of fun.  But, sadly there was a lot more trash-plastic on the beach than when one of us was a bit younger and we visited the same location.  Realization for us that the concerns about ocean plastic are very real.

Here's a pile of several of the pieces of plastic we hauled to the trash can.  Some had been in the water a long time - others much less time.

What to do?  Well, we thought we'd do our share and put plastic in the trash can.  We may have filled a trash can up over our several days there.  And, the good news is that the stretch of beach we worked on did seem to stay a bit cleaner -- meaning the more plastic didn't wash up again over night.  So, it does seem possible to attack the problem.

Here are several of the plastic pieces we saved and brought home.  The water created fascinating textures.  This is what got us thinking about using them for modeling.

And, while we were at it, interesting discovery.  Time in salt water does amazing things to plastic!!  Need plastic which looks like cobblestones or ancient concrete?  You're all set -- just get some beach plastic.

Not sure, but we think this was a piece of a shoe....

We ended up using some to make Sci-fi looking bases for some of our Starfinder Minis.  And, thinking of lots of uses for Ork structures and terrain for 40K.

This piece is more weird - very orange inside.  We wondered if it might have been part of a ball because of its curvature??  We liked how it looked a lot like cracked stone.

We also shared some with our good friend Mr. S at Game Kastle -- knowing that he is a big fan of finding materials which naturally create the textures of real-life for his super detailed models :)
Here are some pieces which must have spent some time at depth.  Think the blue piece was the bottom of a bottle.

We even found a six sided die on the beach.  No idea how long this guy was in the water.  The little dots are pretty worn down.  But, after some scrubbing we could sort of see which side was 6 and which side was 4....

What was that role?  I think we got a 6!!

Caution:  some of the plastic you find is really brittle.  While this might not be great for modeling with, we figure this is some of the most important to pick up and put into the trash so that it doesn't break up into little micro plastic pieces which (as we understand) can really mess up fish and birds.

We've cut a piece of the Ocean Plastic *Shoe* out for mounting on a base.

We put the mini band-saw to work and cut some pieces to mount on square miniature bases.

Here's the miniature we mounted on our shoe plastic :)

We mounted our Starfinder Android mini on the piece of shoe plastic.  The granularity of the pattern on the Ocean Plastic seems perfect to us for the scale of the miniature.  Make it look like the android is standing on a very old concrete surface. 

Here is our Starfinder mystic miniature mounted on the reclaimed Ocean Plastic

And, we mouted our Starfinder mystic on the ball plastic.  Makes it look very much like a rocky alien surface.

All in all -- lots of fun.  Beach gets cleaner, we get weird plastic pieces for models :)

Sunday, March 12, 2017

Tauntin' Da Tau (Working on new cars for the Ork Train)!!!

Hi everyone,

We're gearing up for the next chapter of work on the Ork Train - the Waaaghbash Kannonball!  [Here's a link to some of our most recent Ork Train posting....]

And, since we've had some fun conversations with fellow 40K players at the Reno Summit Warhammer store in the past few months about possible Tau looting, we've decided that the next big project should focus on Tau.

Here's our overall concept:

First of all, we have a good name for the project:  

Tau'ntin Da Tau

...our friend Mr. Z suggested we keep that apostrophe in there, to make the spelling a bit Tau-like :)


 Here is our plan for adding "Tauntin Da Tau" to the Ork Train!

The idea came about this way.  While at the store, one Tau player (who had a very nicely painted army) suggested that we take the top off of a StormSurge and mount that on a car.  That sounded very cool - and the more we have studied the model and thought about the nice massive scale of what that would create, the more excited we were about the idea.

Next, while at the 2017 Las Vegas Open event, we got into a fun chat with one of our Waaagh! on Railz participants -- who suggested that it would be fun to have a train car filled with water - and dunk Tau (while alive) into the tank of water -- to be eaten up by piranha-like-Squigs.

Progress so far:

We've wrangled the train cars we need.

We weren't sure what would look good as an aquarium car.  Turns out that Lionel made some aquirium cars - but it didn't seem that they had actual clear sides.  So, when we were at The Great Train Expo a few weeks back, we were very excited to see this Gold Bullion Car.  And, it has clear plastic windows which can be the sides of our water tanks!!!  We'll remove the gold, of course.

 Here is the Gold Bullion Car we will modify into our Squig Aquarium Car!

And, we also found a pretty inexpensive Crane Car.  We went with the Marx version (not the Lionel version).  One of us had a Lionel Car as a kid -- and it derailed ALL OF THE TIME!!!  This Marx car has simple two-axle trucks - much more simple.


Modification time:

So, the work we have to do now looks like the following....

1) Figure out how to create liquid water for the Aquarium car.  We've seen some references to people pulling this off with acrylic materials you can pour in.  One example is below -- pretty cool underwater scenery and nice tint to the water.  Evidently this wonderful model's photo came from a German modeling website.  Website with example of underwater scenes.

Here's one example of creating very cool water effects.  
This is the type of thing we need to figure out how to do....

2) Create the Squig-Pirhanas.  Thinking that we can probably do that with some green stuff to merge some shark tails (or something like that) onto Squig models.

3) And, of course the StormSurge.  Still hoping that we can find one which someone dropped on the floor or something so that we don't have to build a perfectly good StormSurge only to then lop off the bottom and attach it to our crane....

Well - to work we go.  Welcome any suggestions, and we'll post our progress :)

Thursday, February 2, 2017

Taking the Ork Train to Las Vegas Open (LVO)

Hi everyone,

We are making preparations to take the Ork Train to the 2017 Las Vegas Open convention coming up in 48 hours or so.  Zero-hour for train operation is Saturday evening, 8pm!

Here are our Ork Trains - getting ready for packing up....

Turns out that there is quite a bit to be done!

1) Fixing things which have broken....  It's been a few months since we had our Ork Train Apokalypse at the Reno Warhammer store this summer - and a few spiky bitz have broken off here and there.  Certainly need to fix those!

The hinge on our Kannon Kar suffered a failure.  Fixed that (and added epoxy for fracture toughness) and charged up the Kannon Kar's lithium ion battery for the trip....

2) Packaging the Ork Train.  Certainly checked out things like Battle Foam.  But, for something as heavy and large as the Ork train, decided that it just wouldn't fit into the budget this time around.  So, $6/sheet foam from Walmart -- and fabricating our own foam pieces is the plan.

More work for the mini-band-saw to cut the Walmart foam....

Our foam cutter didn't get quite hot enough to really cut the foam well -- but making it work....

The Dakka Chugga and Pain Train nestled in their foam....  Going to build up two more 2" layers for full protection....

3) Rulz.  We worked on writing down the rules the Reno team had proposed -- and have got those up on the LVO website.  Not sure what everyone will think about them - but I guess we'll find out shortly.

Here's a link to our event on the LVO website....  

https://drive.google.com/file/d/0ByVzaY23LOX-WFFhX0Y1RE9LZHc0blZmNS1lQTc5clQ5cUpJ/view

4) Upgrades which are close - upgrades which aren't going to make it....

a) Working on a "Stay-shun" for Fork and Spork's Orks to use to board the train.  Looking like that WILL make the trip :)

Here is the Stay-shun - ready for lootin'

b) The looted Necron Locomotive.  Still too much to be finished.  Will pack it up to chat about it with everyone at LVO -- but don't think we can have it ready to go just yet.  So, that'll have to be saved for the next Ork Train event....

Tuesday, November 15, 2016

How to get to Warhammer World (International Travel)

Hi everyone,

A short while back, we had the chance to visit the UK.  And, of course, near top of our list of things to see during any free time while there was Warhammer World!

We're probably the last ones to figure it out what Warhammer World is (seems that pretty much everyone knows that Games Workshop has a sort of company store and model-museum in England).  But, in case you're in the same boat as us, here's a walk-through of how we made our way there....

(Link to the Warhammer World website)

Warhammer in London; 40K in London;
Our favorite Ork and Space Marine by London's Tower Bridge.

Step 1:  Get to England

In our case this was a business trip with a weekend in the middle.  If we were to do it again, we'd want to plan for more time - and arrange to take some models along.  In this case, we pretty much arrived in England empty-handed.

Flying was relatively painless.  And, the customs people were quite friendly.  1) They actually thought it was funny when we ("American" speakers) said we'd been working on our English.

Step 2:  Get to Nottingham.

Warhammer World is in Nottingham, UK.  And, pretty much right in the middle of Nottingham proper.  We had decided to avoid driving.  Would have cut down on the travel time - but our "drive on the left skills" aren't so great.  And anyway, if you can manage a train to Nottingham, you can find your way to Warhammer World.

You can see on the Google map search below that it's roughly a two-hour train ride to get there.  Not so bad.  And, we'll point out a few subtle points that we we stumbled upon as we went.... 

Here's a phone screen capture of the trek from London to Nottingham.  Didn't want to risk driving on the left - so working on a route by train.

To begin with, you need to make your way to Kings Cross station.  Pretty easy on the Tube.  We dropped in a handy reference photo for comparison (making sure you're in the right place).


And, depending upon your inclination - while at Kings Cross Station, if Harry Potter fits your liking, you can check out the large display and store arranged at Platform 9 3/4.


A quick hint about booking the train.  There are (at least) two different train routes to get there.  The faster, more direct one costs more.  The slower, less direct one costs less.

We used the slower one on the way there -- the faster one on the way back.

Only downside of the slower one is that you end up spending about 45 minutes waiting for a connection in the nice town of Grantham.

If you happen to be a train fanatic, that's like all good -- because the station in Grantham has lots of memorabilia about the speed run set by the Mallard.  If you're not particularly into trains, this delay might be frustrating....


The train schedule board at Kings Cross - showing our train to Leeds (we'd be getting off at Grantham and changing trains for Nottingham)

 And, our train arriving!

 And, we're on the train!!!  Here are our favorite Ork and Space Marine with our ticket on-board.  They were both very excited to be heading for a sort of "homecoming."  [Also, you'll notice on our ticket that it says "via Grantham" in little letters - that's where we switched trains.]

Arriving in Nottingham....  We saw that there were some failed buildings right by the station.  Not sure about how those came to be in Nottingham.  In the US this is what a failed factory building often looks like.  If that's it, here's hoping that everyone in Nottingham sees better times in the coming future.

It did strike us though that these buildings, though falling down, did look very much like 40K scenery buildings.  And, we wondered if they were in some part the source material for Games Workshop artists.


As we arrived in Nottingham, there were several buildings on the eastern side of the station which looked a bit like 40K scenery pieces.  Not sure of the circumstances for these old failed buildings - and very sorry if those circumstances were sad ones.  But, interesting to see how much the 40K crumbling buildings look like those in real-life.


More photos of the crumbling buildings....

Step 3:  Tram from main station

When you arrive in Nottingham, make your way out of the station - and then up onto the elevated tram platform.

[From the station, Google maps has it as a 30 minute walk.  It was a little cloudy when we were there - threatening some rain - so even though we had the time for a walk, we took the "NET Tram" tram.]

We were a little bit confused about which side of the street to stand on....  We ended up asking grandmother and grandson for help on which direction's train we needed in order to go "west" to Warhammer World.

Our phone indicated that we should take the "Toton Lane" tram -- ride for three stops to "Gregory Street."

That turned out to be exactly right :)  And, the cool thing is that we would see Games Workshop on the left as we arrived coming down a slight hill toward Gregory Street.

 Here's our phone map of the route from the Nottingham Station to the Gregory Street stop for Warhammer Work.

The tram stop has a very nice sign to let you know how long it'll be until the next tram.  As you can see here, they run quite often.

 For piece of mind -- here is the list of stops on the Toton Lane tram line.  Sure enough only three from Nottingham Station up to Gregory Street (Warhammer World's stop)

Here's another phone screen-shot showing the route :)
Step 4:  A short walk.  

The walk down the street is very nice.  On a Saturday it wasn't a very busy road.  Crossed a small bridge with boat canal going underneath....

And, then walked into the parking lot of Warhammer World :)


Walking from Gregory Street back to Warhammer World - crossing over a very nice canal!

Battlegaming One; How to get to Warhammer World; Walk to Warhammer World; Warhammer World Directions; WarhammerWorld Directions
A quick shot from our walk to Warhammer World

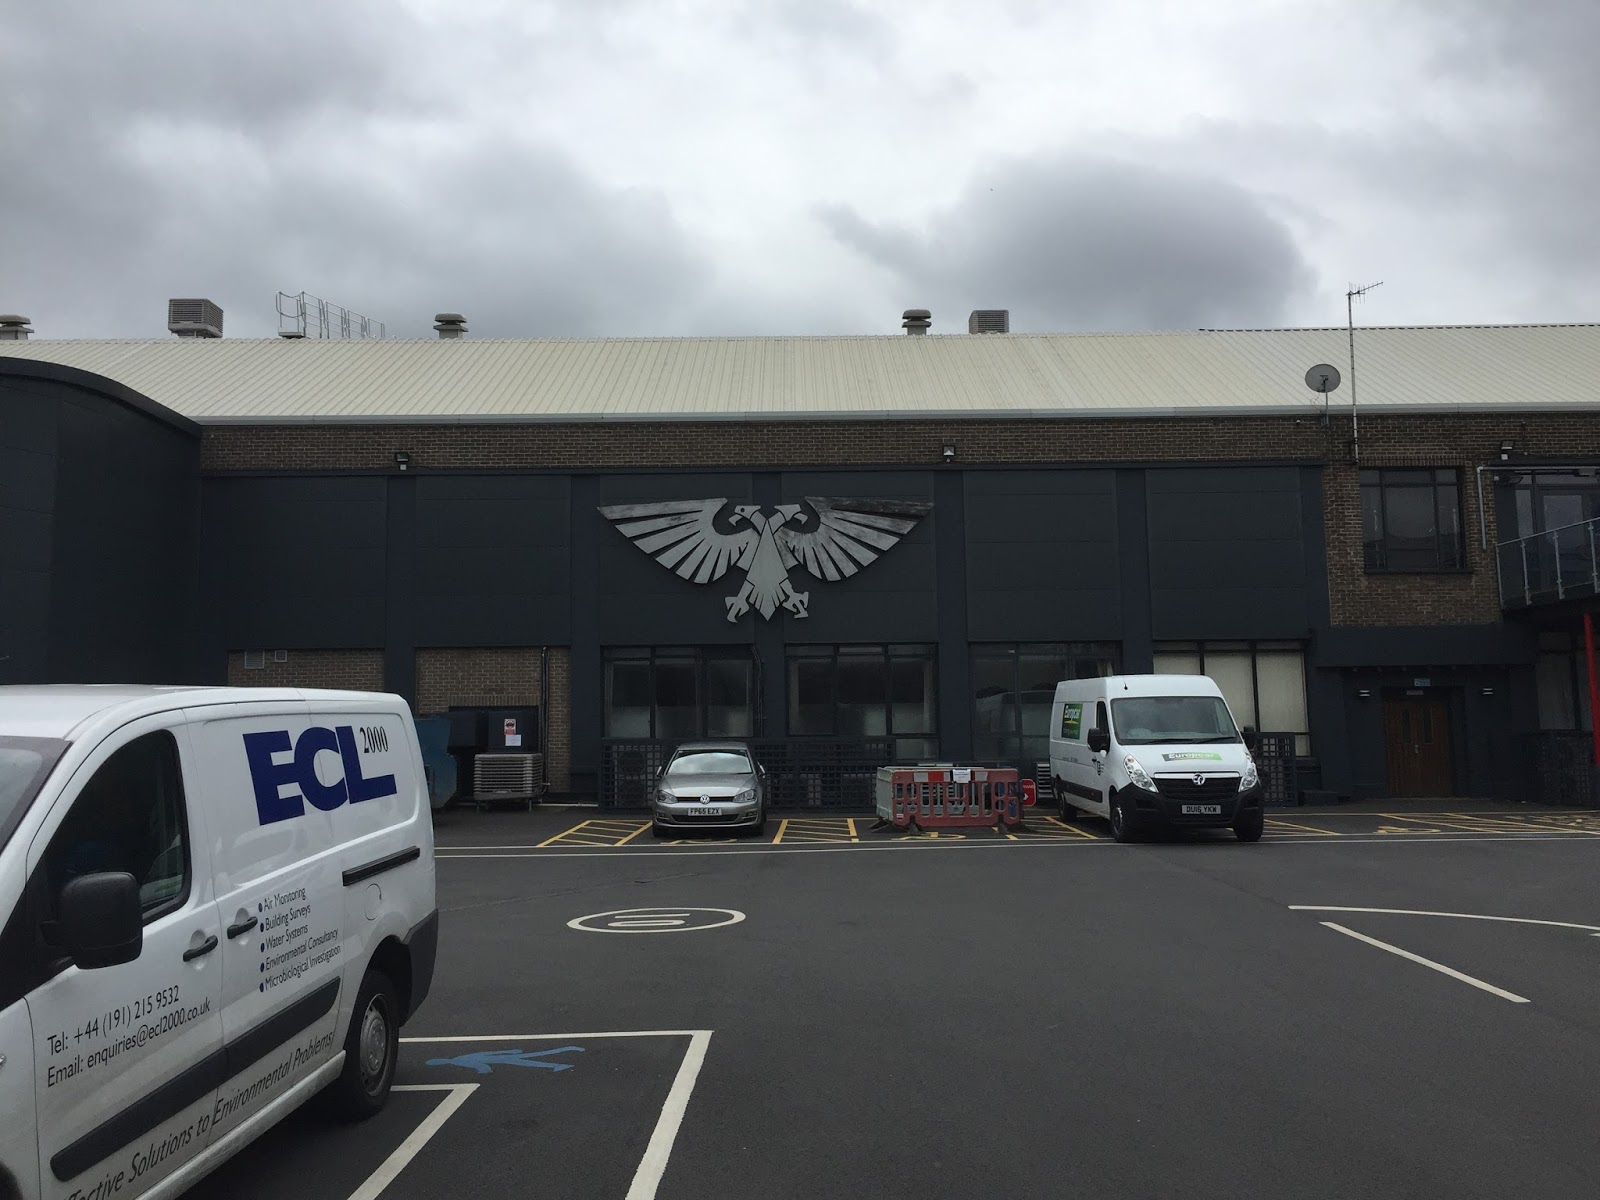
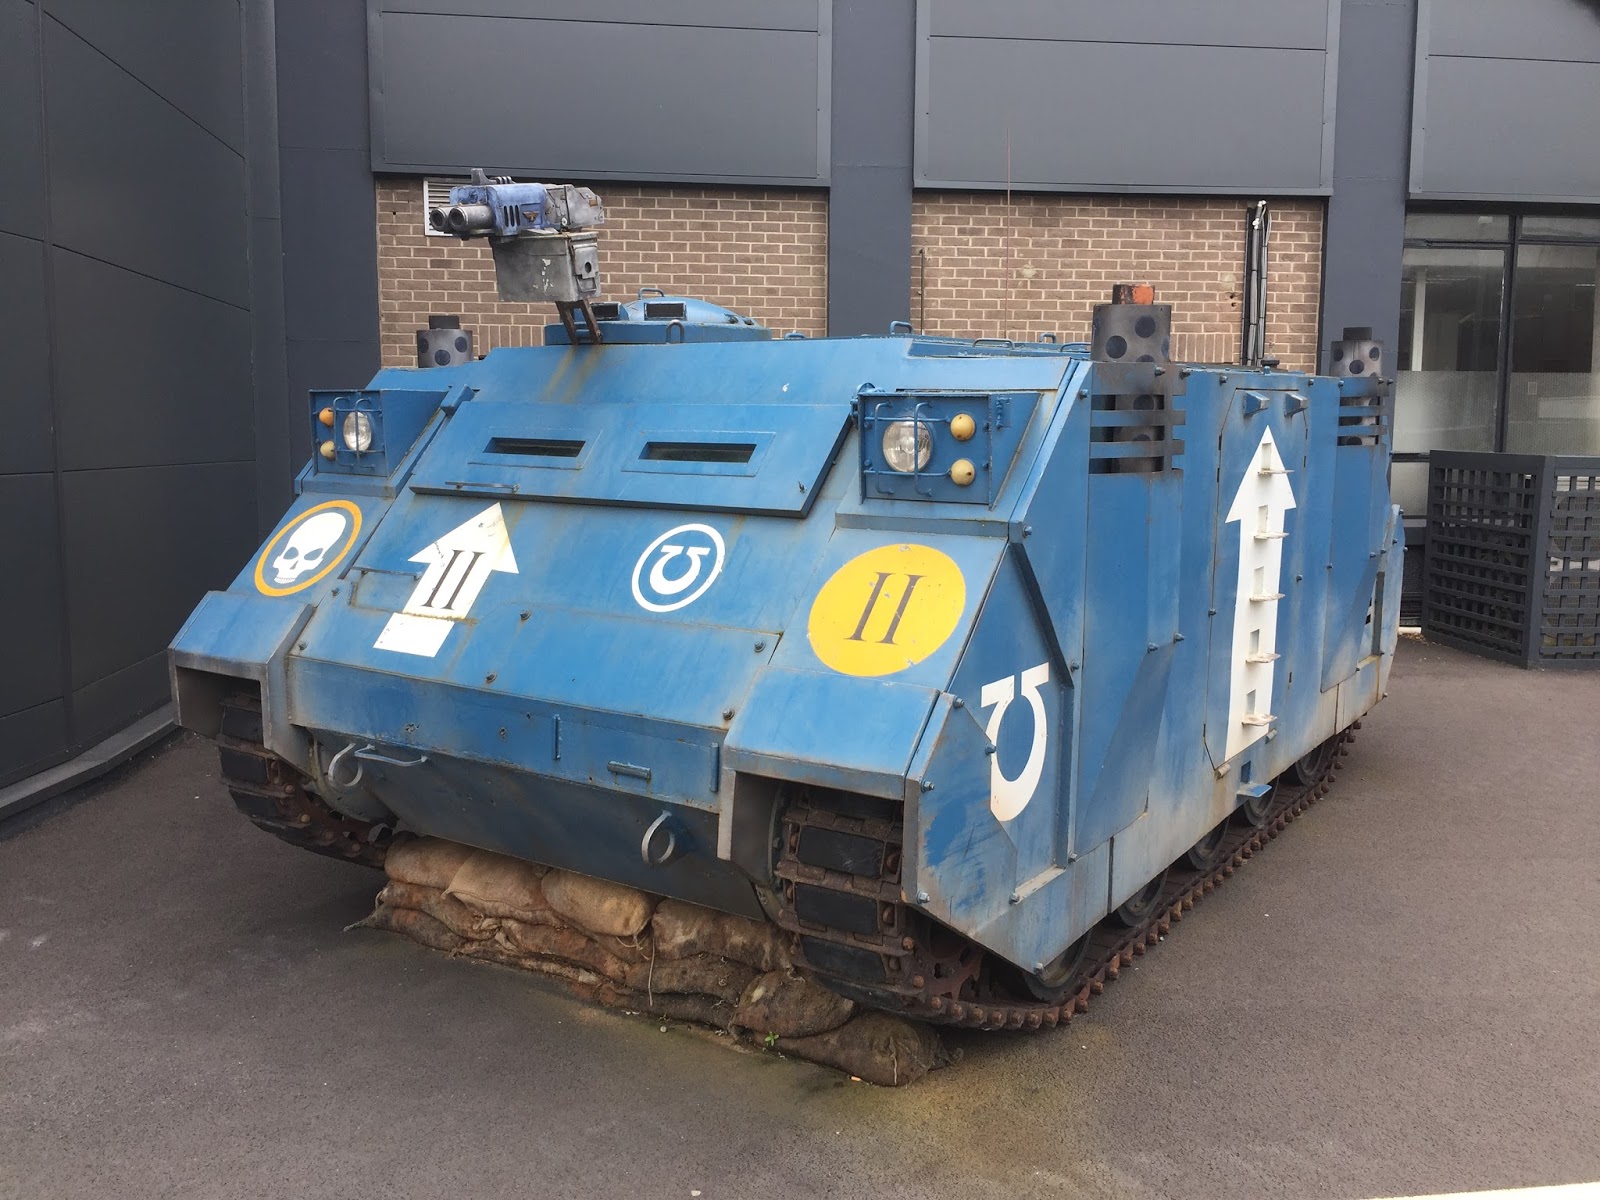
The good news is that you know pretty well when you've arrived.  You've got the Games Workshop logo on the building.  And, there are also the full scale Ultramarines tank in the parking lot in case the other big graphics on the building aren't enough to tell you that you've arrived!

And, Warhammer World itself -- was awesome :)  Highly recommend making your way there!!  We're already working on ways that we can visit again....


The Warhammer World building with large emblem!!


Ultramarine's tank on display at Warhammer World :)

Sunday, October 30, 2016

Armies on Parade - Crimson Fists Frigate, the Fist of Vengeance

Somewhere near Pythos in the Pandorax System....

"Supeem Warboss Fork -- pleez check dis!  Dey iz turnin' to ram us!"

Fork, the Supreme Warboss of the Yellow Orks turned to his Nav Boy's display; and focused on the blue craft on the image.  As its prow swung toward his Ork Hulk, Da Ruinin' Runcible, a huge grin dominated his expression.  "Lovely, dey IZ comin' righ' to us!"


Turning to, he bellowed, "Nav Boy!  All reactys to full!  All ahead frank!"  And, then drawing in an Ork lungful threw back his head with a full war-cry:  "Waaaaagh!"


Ork Hulk; Battlegaming One; Ork Hulk with Space Marine Frigate; Ork Hulk with Space Marines Ship
Fork and Spork's Hulk - Da Ruinin' Runcible - With Looted (Failed Ramming Victim) Crimson Fists Frigate as Background.

An Explanation:

Back in August when we ran the Ork Train at the Reno Summit Warhammer Store, Mr E, (the store warboss) challenged us to take part in the Armies on Parade event in October.

The problem, of course, was "how do you fit an Ork Train on a 2 foot x 2 foot base?  The answer we came up with was to use 3 dimensions.  After thinking of a while we had realized that if we created a model of the inside of Supreme Warbosses Fork and Spork's Hulk that we would have plenty of space for the train.

Yet, as we started thinking about how to create the hulk out of foam, we felt that it would be fun to have something in the background to give nice contrast to our Ork lootings.


Write-up Part I -- Creating a Crimson Fists Frigate to be part of our Ork Hulk :)

Our friend Mr. M has beaten us with his Crimson Fists enough times ("preferred enemy Orks" rings in our ears) that we needed a little bit of modeling revenge.  And, we chuckled a bit as we imagined what might take place if a hapless (and smallish) Crimson Fists Frigate should try to ram an Ork Hulk.

The Hulk would win in the crash of course -- and after spawning to make up for any losses in the hand-to-hand assault which would inveitbly result -- the Orks would loot the remaining hardware from the Frigate.

So, we thought that it would be fun to make at least one wall -- or section -- of a Crimson Fists Frigate as an incorporated part of our Armies on Parade display.

How to do it?

We spent some decent thought pondering how to integrate the Space Marine's Frigate.  And, finally went with using the wall of the frigate as a "background" for the section of the hulk.

 And, we figured we could make something pretty gothic looking if we used a set of the scenery building pieces.

Then, at the local Game Kastle's swap meet we found this:  And, if we split it apart, we figured it would make great pieces of a Frigate!

We were worried that it would look flat, though.  So, we had the idea of making it with two flat sections one sloping up; the other sloping down.  We noticed that lots of Battlefleet Gothic ships have that diamond-shaped cross section....

Our concept for the section of Space Marine Frigate.  2 feet wide, 2.5 feet tall.  Angled so that it looks a bit Gothic.  We were thinking to hold it against the "rock" of the Hulk using magnets....

So, we built a plywood frame....  Here is the back-side of it.  Two pieces of 1/4" plywood attached to 2x4 pieces which we trimmed on a band-saw to match the angle we wanted.

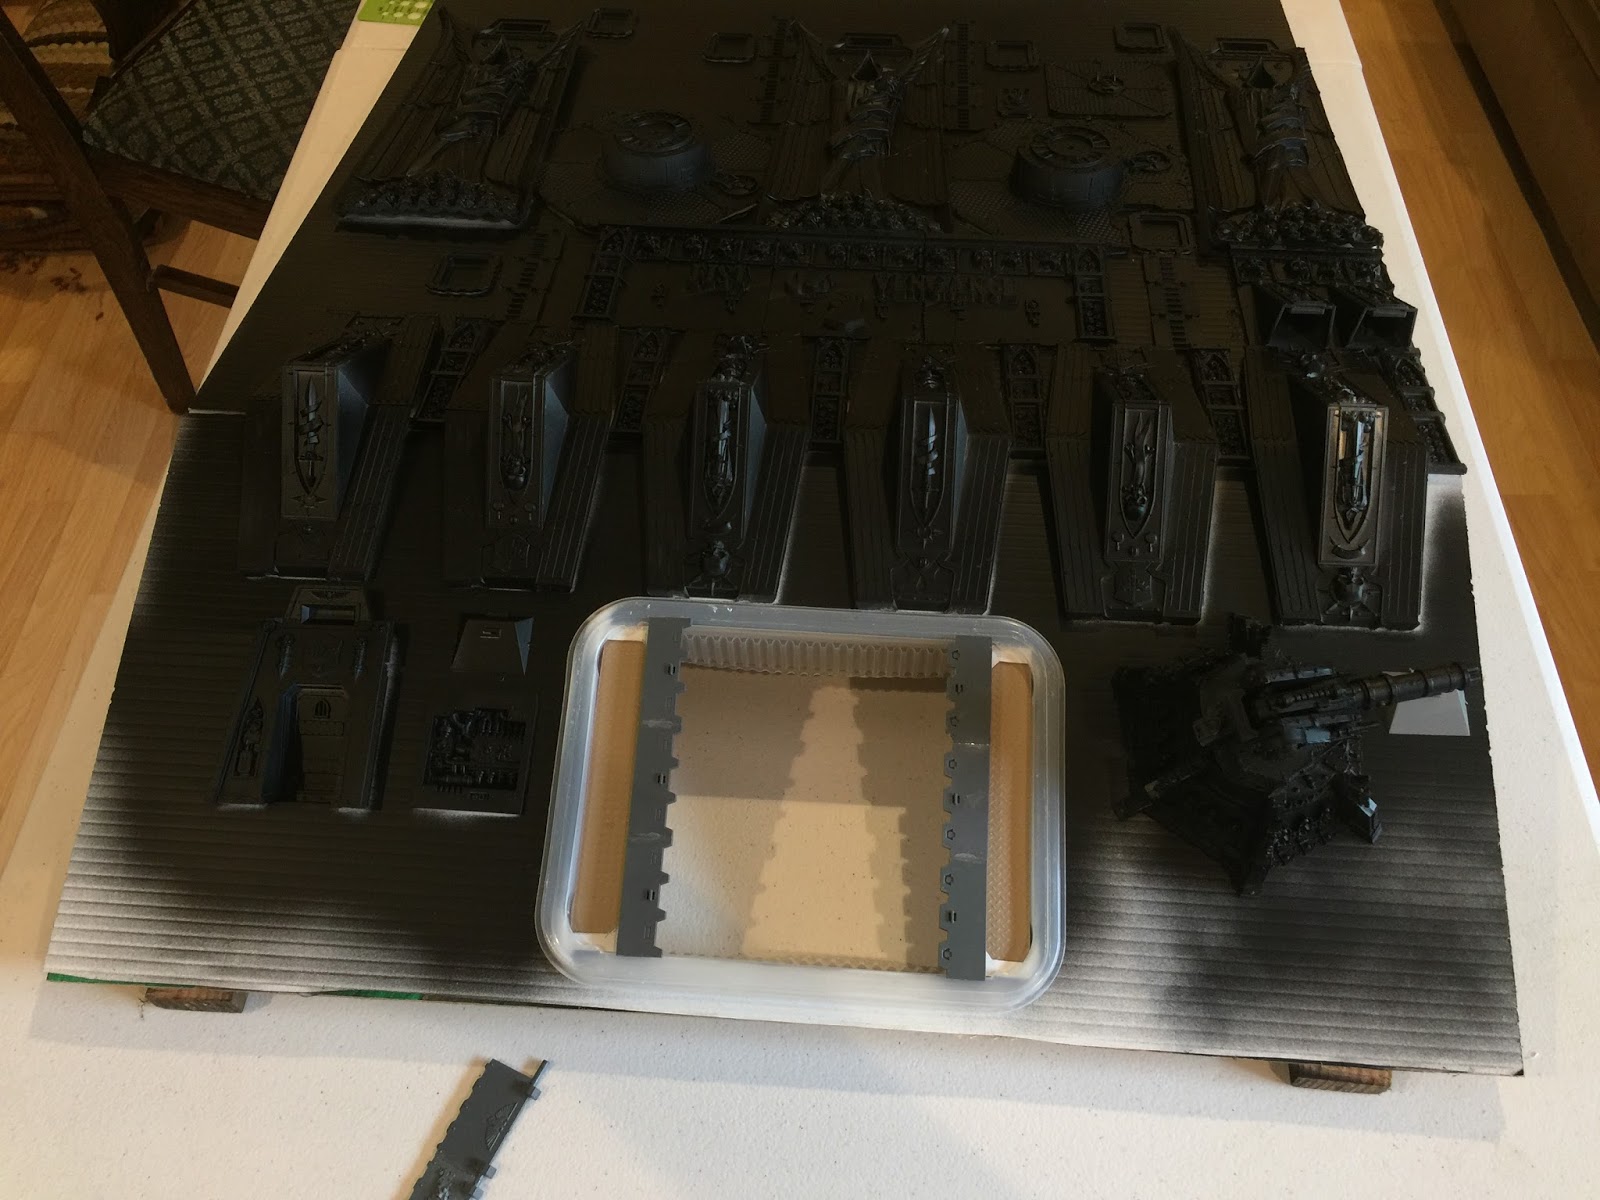
Here is our plywood frame.  We painted it grey.  Ran out of time to do anything more fancy.  Going forward, we'll coat it with plastic and create some "insides" of the frigate for the Orks to be looting....

Then we covered it with plastic....  We were wanting the surface to look like a space ship.  We knew that wood grain would be hard to cover up.  We plastic sheeting at Home Depot which looked nice.  Plus, the ribbed structure puts small ridges in it -- which end up looking a LOT like the welded hull of a ship.

Here is the plastic sheeting we used.  Pretty inexpensive at Home Depot.  Cuts very easily, etc....

Once we had covered our wooden frame with the plastic, we realized that this plastic was not super easy to glue to.  We tried plastic glue out.  Did not bond (just stayed as a liquid on the surface of the white sheet).  Since this is a very large structure, we were worried that super glue would not create a very elastic structure.  So, we did some quick testing....

Of course our old friend epoxy would certainly bond.  But, we didn't have a lot of time before the Armies on Parade event -- and we would be in trouble even with the 5 minute curing epoxies.

Luckily hot glue turns out to do a really super job of bonding 40K plastic to the white sheet material.  In the trial (below) we glued a tank turret piece on and could not budge it after 30 seconds!

Here is our gluing test.  Plastic glue didn't work.  Hot glue was great!  (And, hot glue was really fast -- certainly compared to epoxy!)

Well, at first we were thinking to build our Frigate out of pieces of Imperial Buildings -- such as some of the terrain sets.  Mr. E had pointed out that the windows on those have quite a "gothic appearance" - just like Battlefleet Gothic's Imperial ships.

However, when at the Game Kastle swap meet we spotted a cast-aside Fortress of Redemption we new we had found some better raw materials!

Here is the donor Fortress of Redemption.  Turned out to be much easier to take the turret sections apart than the tower itself....

Breaking the Fortress apart turned out to be pretty tricky.  In the end, we used hot water to weaken the glue bonds - and then pried things apart.  We ended up with all of the pieces intact (for the most part).

Then, we started trying some layouts....

Right away, we had the idea of using the building skirts along the bottom of the top portion of the Frigate.  Then we noticed that we had just enough of those skirds to put some right-side-up -- and another piece reversed.

Trying layouts of our pieces.  Part of what we tried to work out was anticipating where we would put a blast hole in the side of the Frigate.

After some trials fitting we started hot-gluing things down.  This is a good point to add that we ended up purchasing a little band-saw about a year back to help with another project.  That turned out to be HUGE for building the frigate.  We were able to carefully trim sections off of the Fortress's pieces with nice repeat-ability.  And, it really helped with the speed of construction.

Our trusty Ryobi mini-bandsaw in action.  Turned out to be extremely useful for trimming the pieces in a nice and straight fashion.

As we started gluing things down (and that's hot-gluing, mind you), we took a break and showed our progress to Mr. S at GameKastle.  He gave us several additional pieces of advice:  1) work on making sure that the Frigate doesn't look like bits glued to a board; 2) use the two color spray paint trick; 3) always work on building your narrative....

So, one thing we did was carve out the white plastic where we had placed access doors so that they looked realistically indented.  That did help a little bit with the appearance.  The biggest factor though (in hind-sight) was deciding to make the Frigate's walls out of two angled pieces.  It still allowed us to have a wall at 90-degrees to the Hulk's shell -- but created more interesting internal angles for viewing.

Here is the Fist of Vengeance with most of the components glued.  Still some work to go on the cargo bay....

Part of the grand plan was to have the Fist of Vengeance in a condition where it had *just recently* rammed the Orks' Hulk - and the Orks were gearing up their looting efforts.  So, one idea was to create a cargo bay at the bottom.

We found a plastic salad container (from Trader Joe's grocery store) which looked pretty good as a cargo bay.  Then we added bay doors slid most of the way open.


Then, we started priming everything black as Mr. S had instructed.

We have most of the black primer on.  Turned out using 2 cans of black primer for this project!!  Got the cargo bay doors fashioned at this point - ready to prime again :)

We didn't want the Frigate to look perfect - so we were planning for a blast hole on the upper left portion.  We used a "hole saw" to cut a hole in the wood behind the plastic.  Then used a heat gun to melt away the plastic surface.

We did this after we had put on our Space Marine blue coat from the top angle -- and Alien Purple from the underneath angle.  So, we primed the blasted hole black again.  And, this ended up creating a nice "charred" look!

Here is our blaster hole - thanks to our heat gun!!  Mr. S had suggested that a heat gun held nice and steady up close to plastic would have a nice effect - and sure enough!  What we did was heat it up and then poke it with a screwdriver to make it look "blown inward."

For the final painting, we decided to keep things simple.  We used some nice red to paint a few accent items -- such as the Crimson Fists logo and the ship name.  Decided to also paint the ribbons on the large side-of-ship statues as well.

40K Size BFG
Here is The Fist with the red painting done....  Also, have the cargo bay put together....

And, lastly, we used magnets and washers to mount guns onto the turrets.  We decided that any good Space Marine's Frigate would be sporting weapons like Plasma Obliterators -- so we borrowed our Ultramaries Obliterator for this mission.  :)

And, here it is with the turret-guns magnet mounted.

Crimson Fists Frigate; Crimson Fists Ship; Space Marines Ship; Model of Imperial Ship
And, here is the finished Fist of Vengeance!

So, that's the story of building the Fist of Vengeance Frigate section for our Hulk.

More writing to come -- we'll write-up building the rest of the Ork Hulk.

And, of course, much more work to be done.  Ideas at this point:
- Build internals for the frigate on the reverse side of the model!
- More painting?  Although we liked how this ended up a bit muted for a background piece
- Add Orks and Grots working the surface over.  (That IS the reason the "F" is bent on the "OF" in Fist of Vengance -- we'll have a grot pulling it off.)

And, not really sure what to do about the fact that the Crimson Fists seemed to have used a pretty unconventional spelling of "Vengance".  For now, we'll keep it.  Fork and Spork are enjoying the humor of Space Marines spelling something the way Orks would do it!